




15 Halloween Nail Ideas for 2026
The best Halloween nails for 2026 are black French tips, ghosts, webs, oxblood and witchy cat-eye.
Every October it happens. A client sits down, slides her phone across the desk, and there it is, a screenshot of ten long stilettos, each one a different hand-painted horror film. She's booked in for an hour, and the costume party is on Saturday.
I've been doing nails for over 15 years and Halloween is still my favourite holiday of the nail year. But I've learned that the best Halloween nail ideas aren't the most complicated ones. They're the ones you can deliver beautifully in the time you've got, that last past the party, and that your client is still happy to wear on 1 November.
So every design here is sorted by the time it adds to a standard appointment, whether that's a gel manicure on natural nails or a full set of artificial nails. Ten-minute wins first. Proper showpieces last. I've added the products I'd reach for and the mistakes I see techs make every single October.
And because we're in Ireland, where Halloween actually began, there's one design at the end you won't find on any American Pinterest board.
What Colours Are Halloween Nails?
The classic Halloween nail colours are black, orange, purple, deep red and white, with green for anything involving slime or witchcraft. Across the 2026 nail trends, the darker jewel tones are leading, with oxblood, black cherry, plum and forest green, often finished with chrome or cat eye. Metallic silver and gold work as accents.
My advice? Build the set around one dark shade and let the art do the shouting. A full hand of orange and black looks great on the 31st and a bit sad by the 3rd. And if your client is matching her nails to a Halloween costume, ask what she's wearing before you pick a single shade.
Halloween Nails at a Glance With Time, Skill and Products
Here are all 15 designs with the time each one adds, the skill level and the products you'll need.
Times are my guide for an experienced tech working on a finished gel base. If you're newer, add half again and don't beat yourself up about it.
Easy Halloween Nails You Can Do in Under 15 Minutes
Solid black, oxblood, red and black ombre, black French tips, one tiny ghost and cat-eye all add under 15 minutes. These are your Speedy Gonzalez sets. They're perfect for back-to-back days in spooky season, for clients who want "something Halloween" without committing, and for anyone who has to look professional at work on Monday.
1. Matte Black Nails
One solid black gel, cured properly, under a matte top coat. That's the whole design, and it's still one of the most striking Halloween manicures there is.
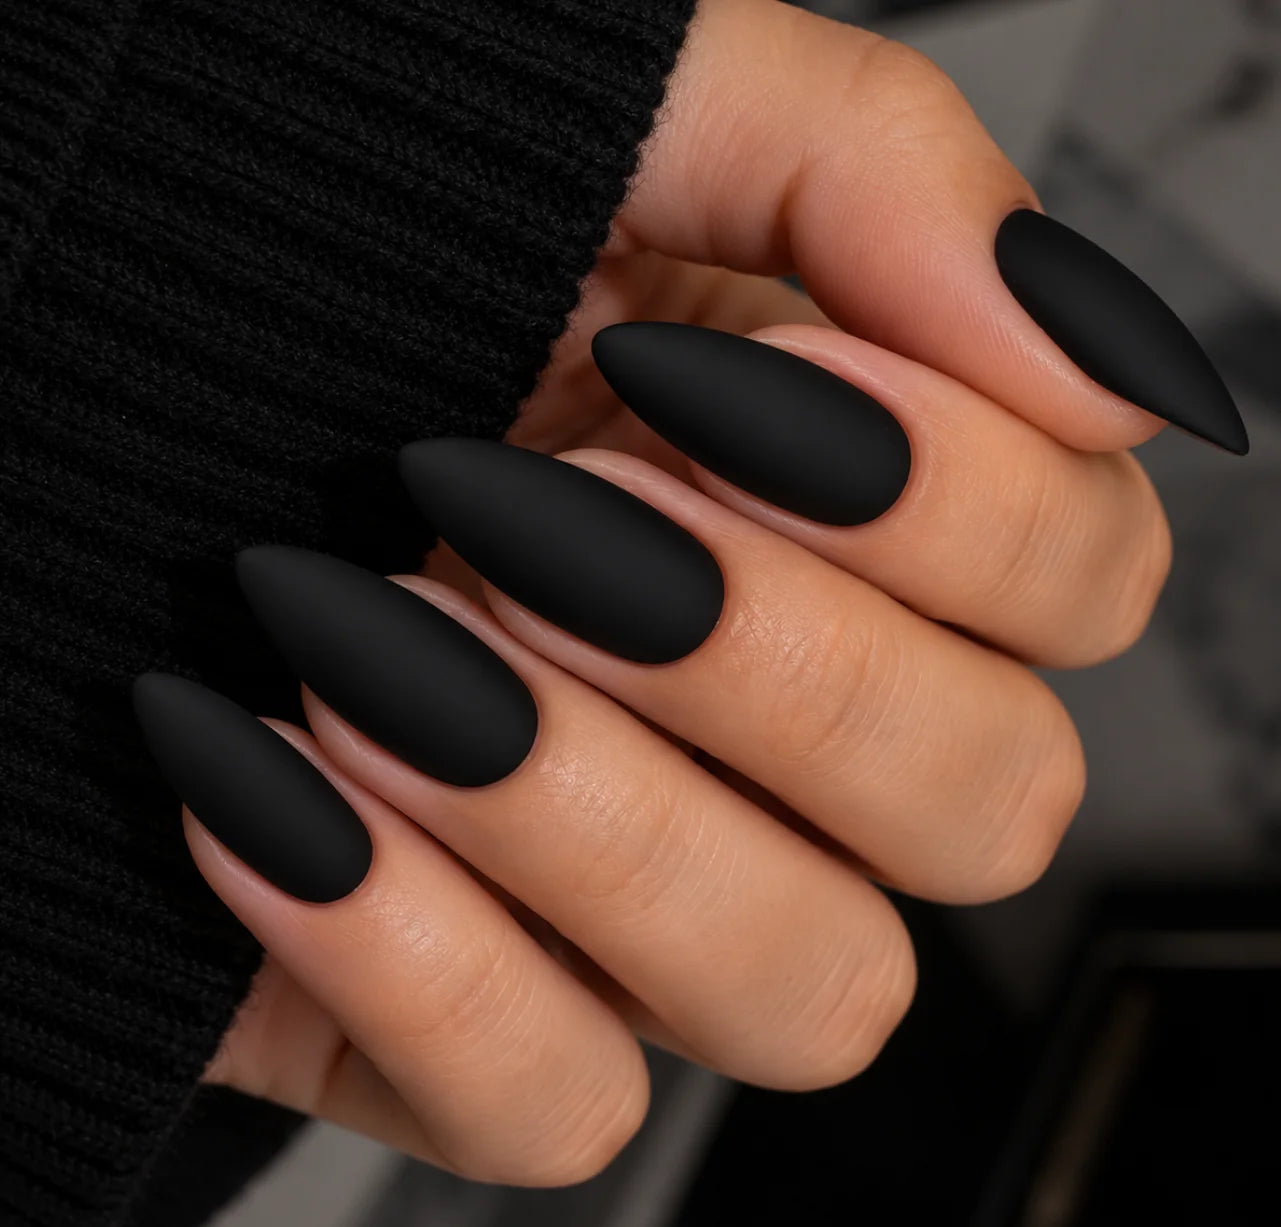
The mistake I see is techs going too thick with black to get coverage in one coat. Dark, heavily pigmented shades block light, so a thick layer can stay soft underneath while the surface looks cured. Two thinner coats, or medium one layer every time.
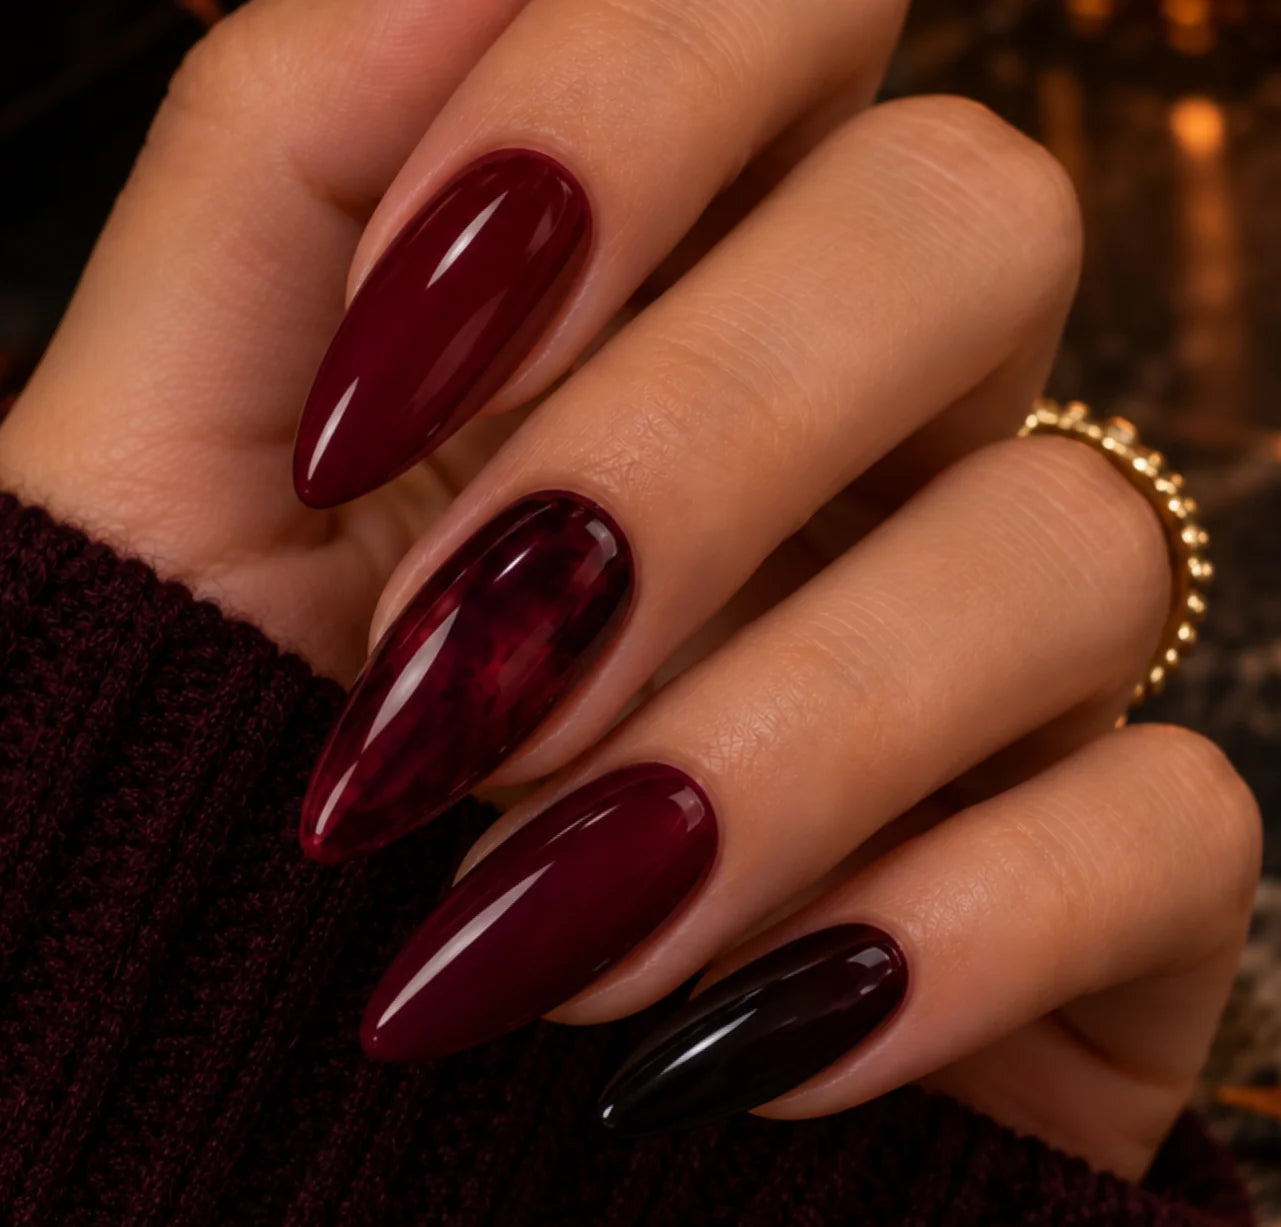
2. Autumnal Oxblood and Black Cherry Gloss
A glossy deep red that reads almost black indoors and glows like a glass of red wine in daylight. If your client wants to feel Halloween without looking Halloween, this is the one.
It's also your best answer to the 1 November problem. Where I grew up in Poland, 1st November is All Saints' Day, when families light candles at the graves of loved ones, and nobody wants cartoon Halloween art on their hands for that. Oxblood carries straight through to Christmas, so your client gets eight weeks out of one set instead of one weekend. Get the one from Kohana Mystic Eclipse Collection Midnight Abyss.
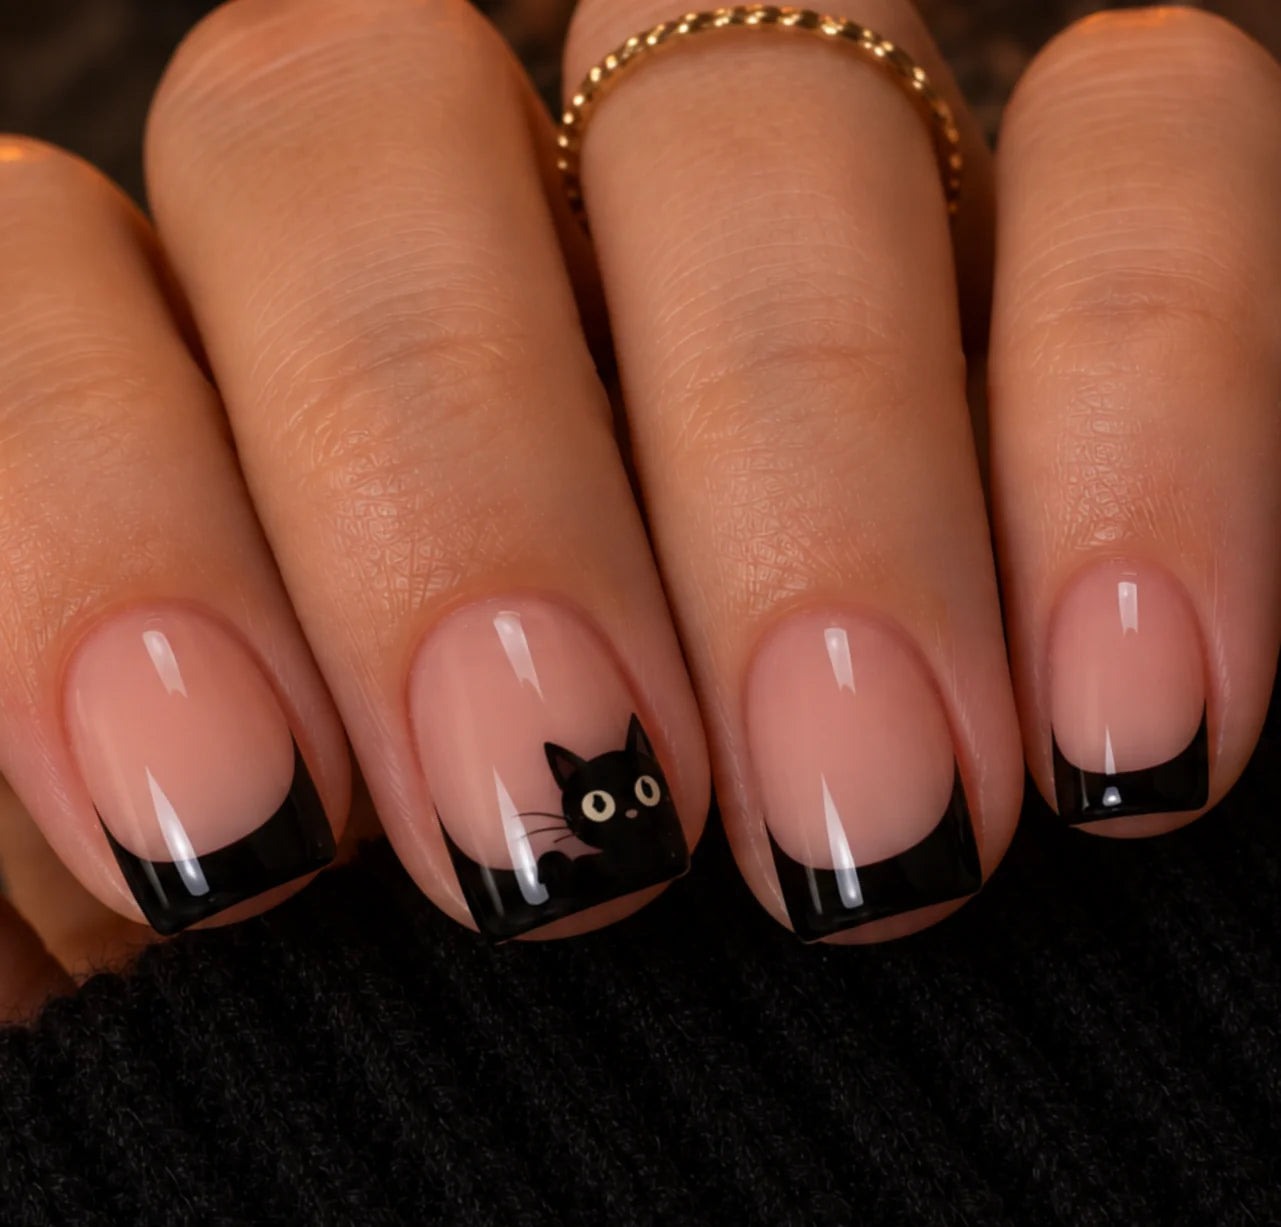
3. Minimalist Black French Tips With a Peeking Black Cat
A classic French with skinny black tips instead of white, and a tiny black cat peeking over the ring finger. Keep the smile line fine and crisp, and the whole mani looks expensive rather than costume. For extra Halloween, paint the thumb tip in deep orange. Clean, quick, wearable.
Funny enough, the French manicure never came from France at all. It started in Hollywood in the 1970s and took its name from the Paris runways.
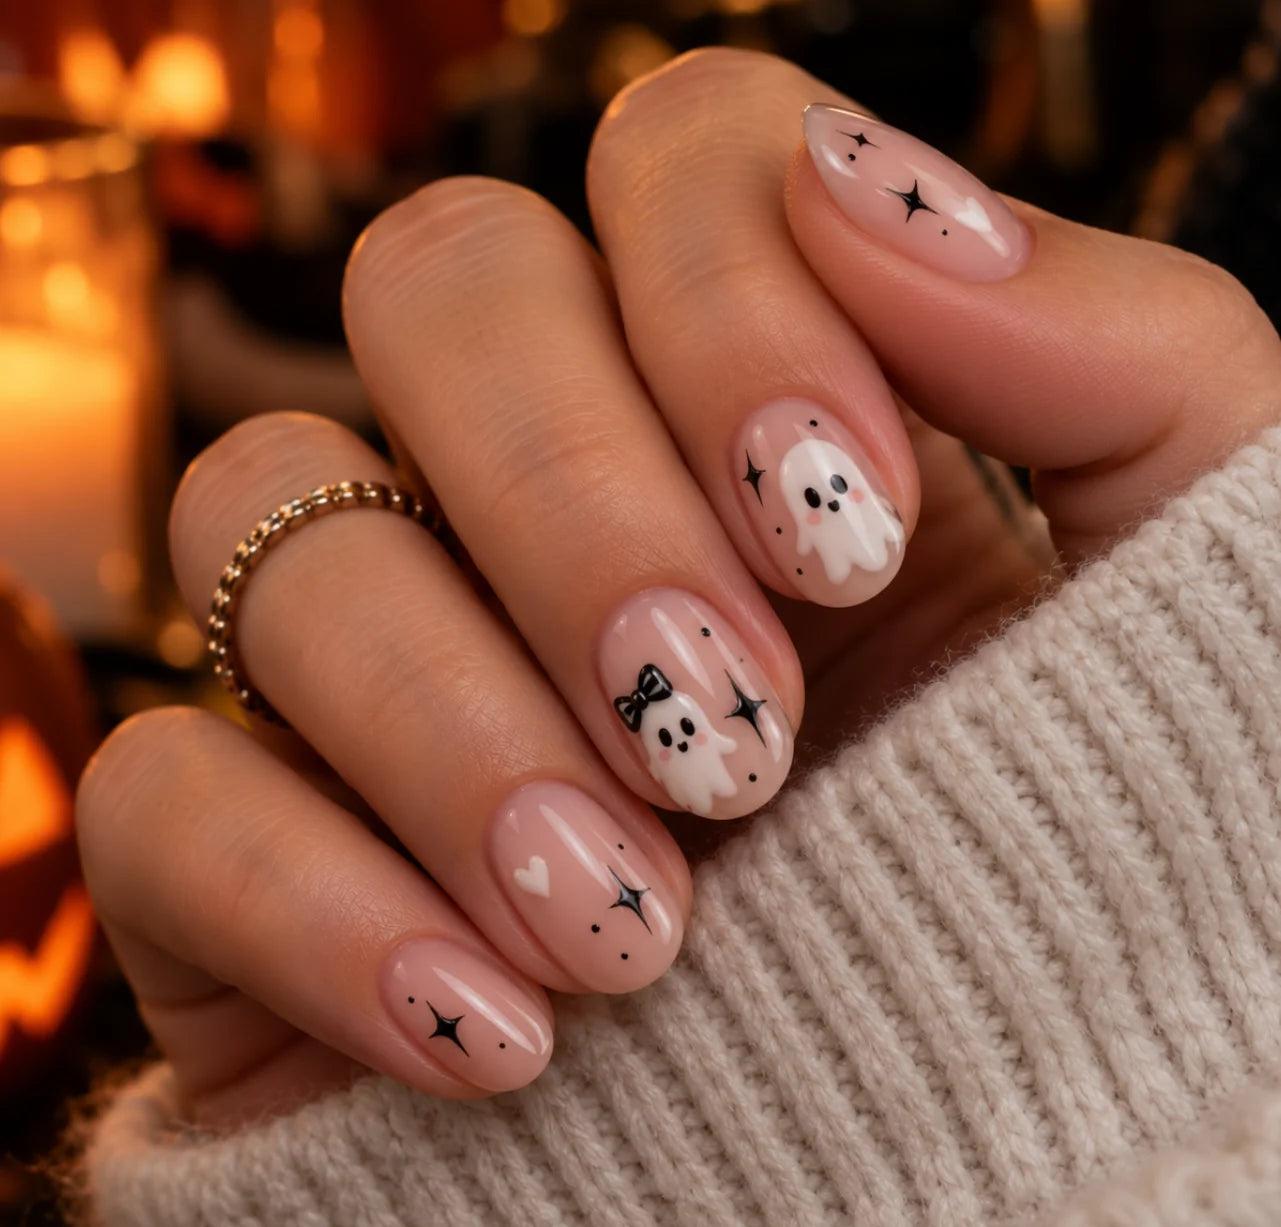
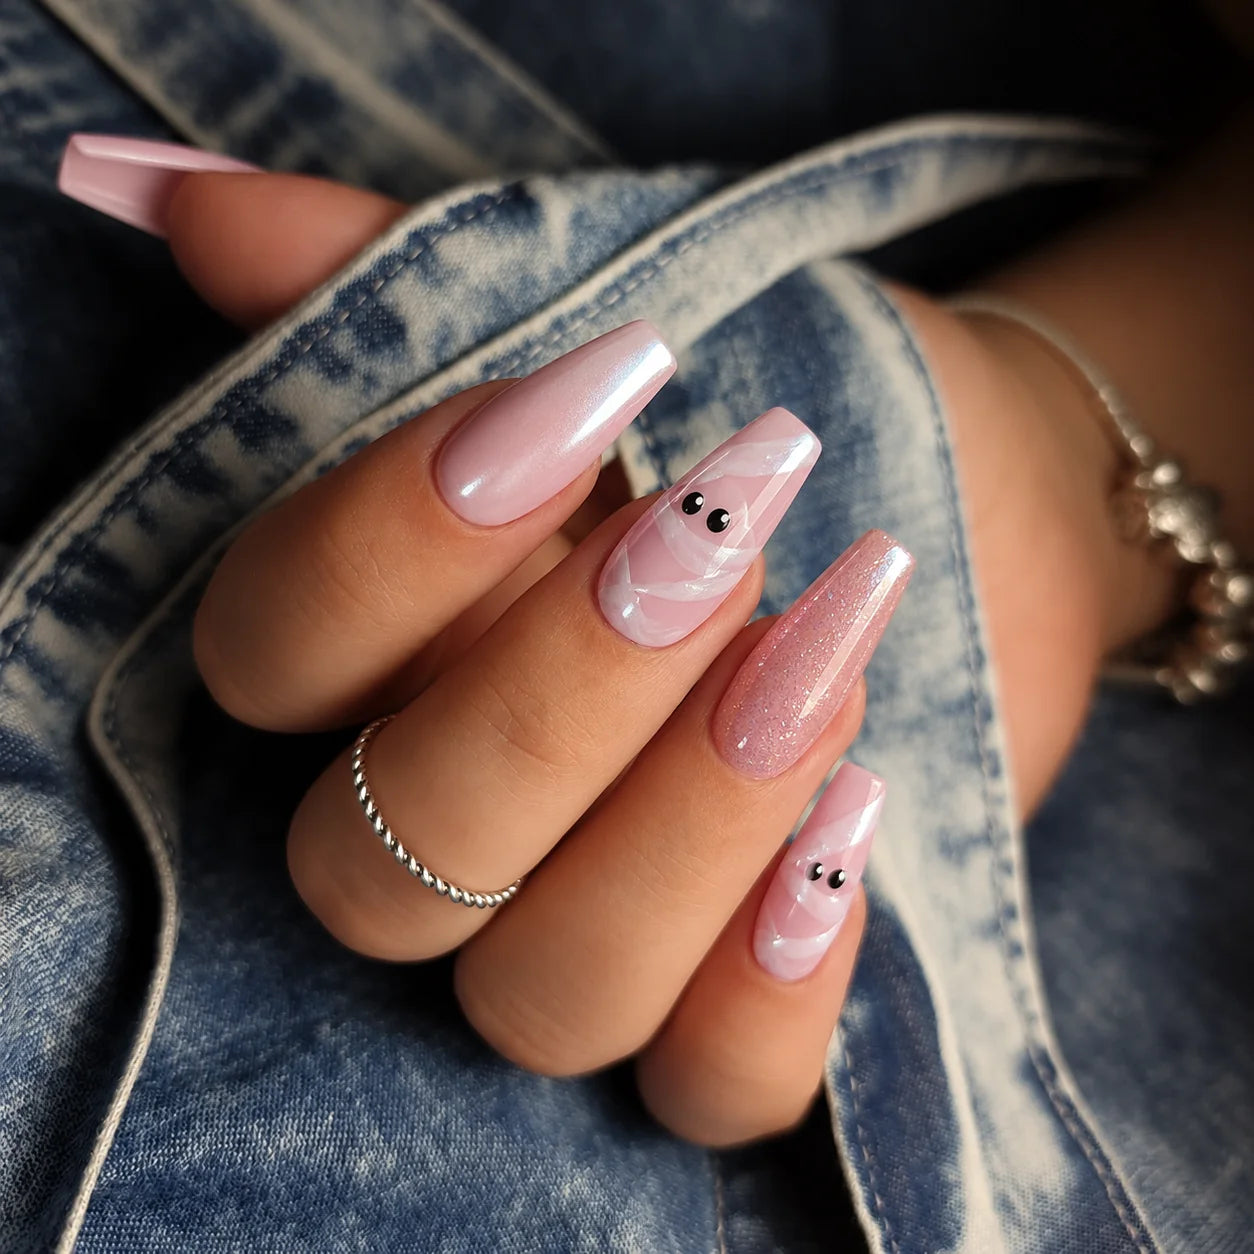
4. Cutesy Ghost on a Milky Nude
A sheer milky nude on every nail, then one small white ghost on the ring finger with two black dots for eyes. Your quietest Halloween client will love this, and so will her boss.
Use a gel paint for the ghost, not a regular gel colour and definitely not an air-dry nail polish. Gel paint is thicker and more pigmented, so it holds its shape and won't spread before you cure.
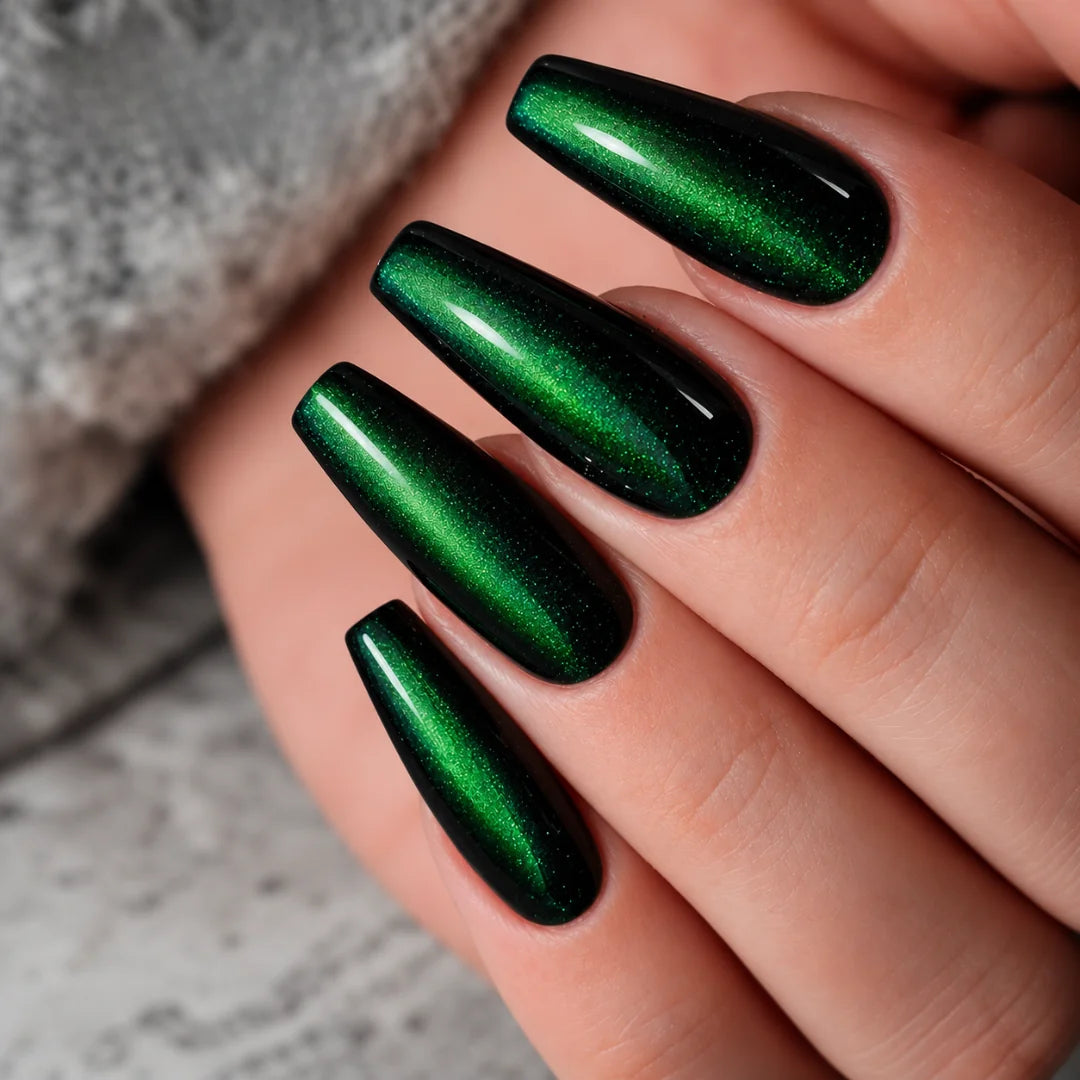
5. Witchy Plum or Forest Green Cat-Eye
A magnetic gel in plum, forest green or black gives you a moving, witchy shimmer with zero hand-painting. Cat eye was practically invented for October.
Hold the magnet close for a sharp line or further away for a softer glow, then cure immediately. Wait even a few seconds and the particles start to drift.
Halloween Nail Art Designs That Take 15 to 30 Minutes
These six designs each add 15 to 30 minutes of hand-painted art to a standard appointment. It's the sweet spot for most salons, with enough art that your client feels she's had something special, without blowing up your diary for the rest of the afternoon.
6. Spiderweb Accent Nails
A white web on black, or a black web on a nude. Start with three or four straight lines fanning out from one corner, then join them with little curved "swags" between each line. Two accent nails per hand is plenty.
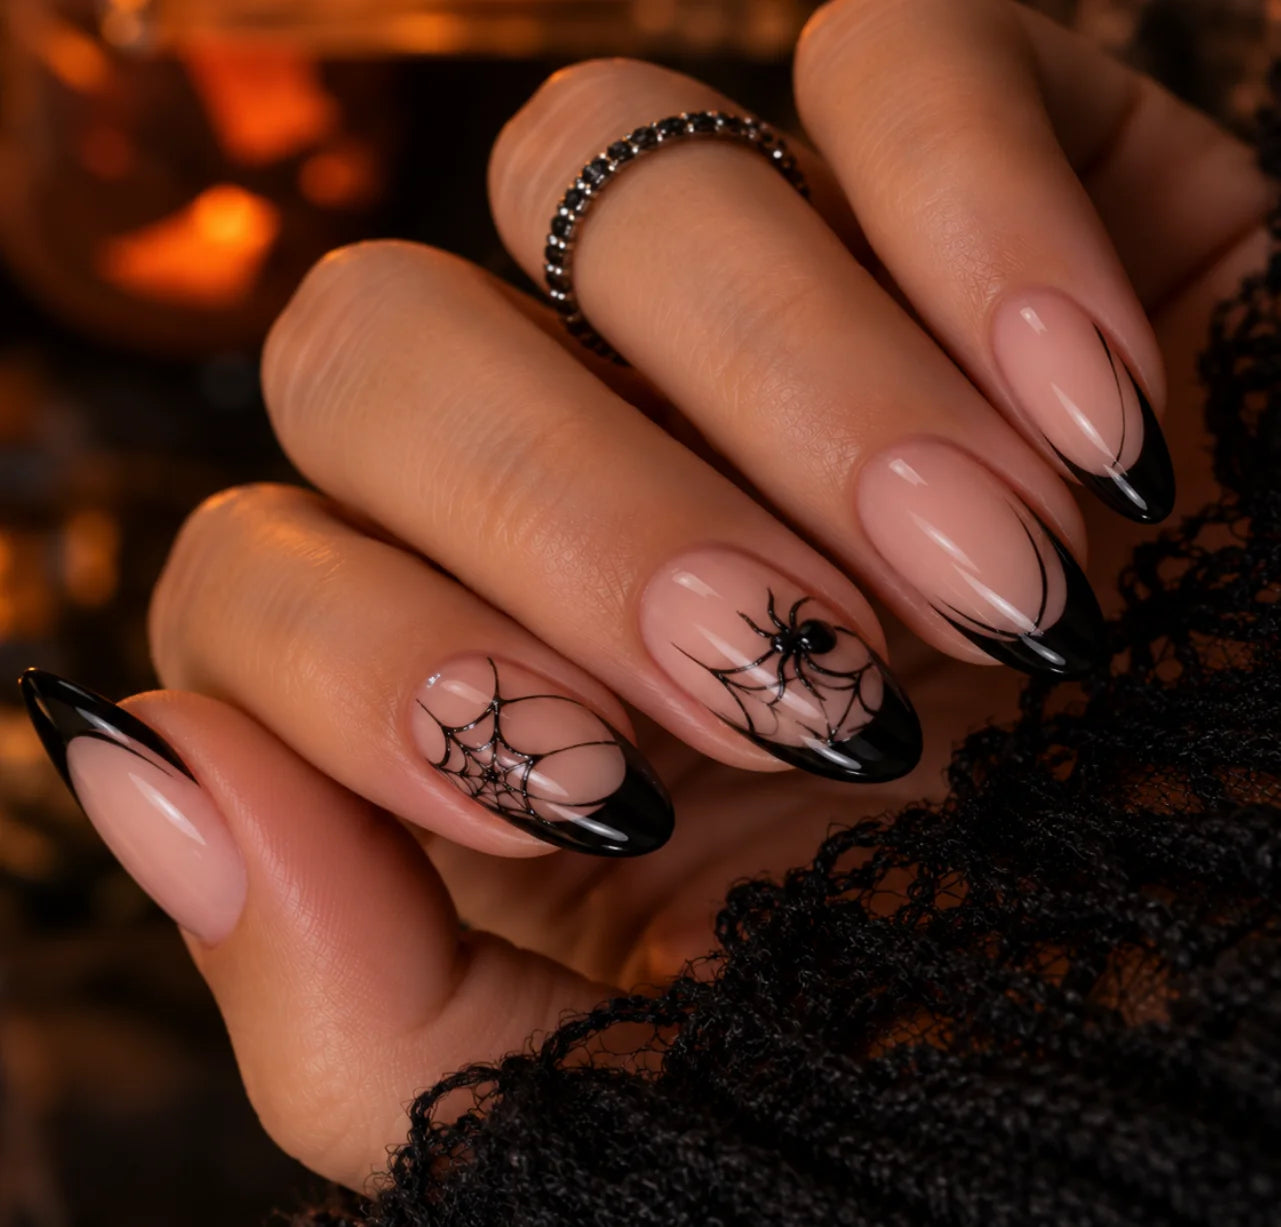
Clients always think webs are hard. They're not. Once you've done ten, you'll do them in under two minutes a nail. Use a Spider Gel for the thin line effect.

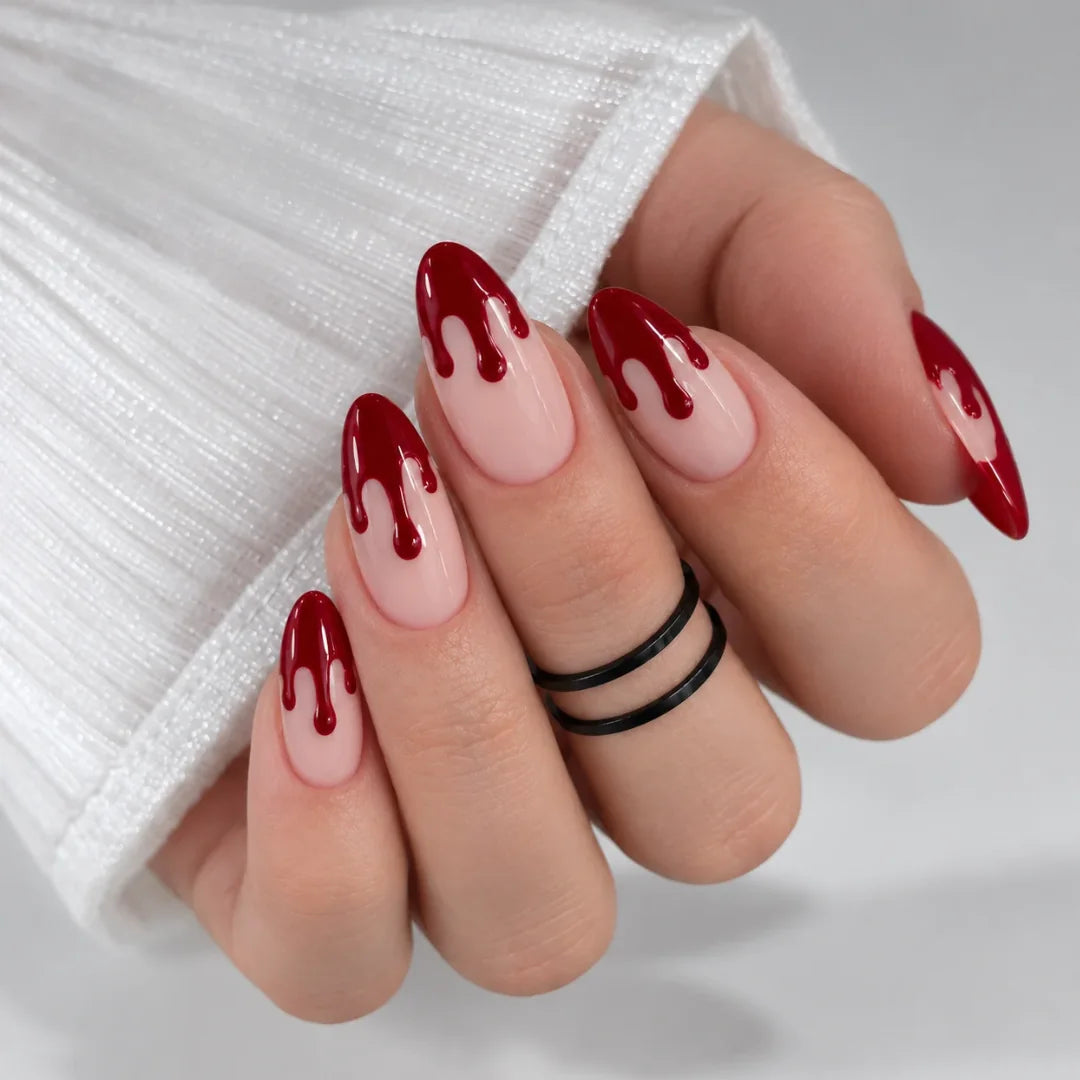
7. Blood Drip French
A sheer nude base with deep red trickling down from the smile line. Pull each trickle to a different length and add a tiny bead at the end of each one so it looks like it's still falling.
Deep cherry or burgundy looks far more grown-up than bright red here. Finish with a high-gloss top coat so the blood looks wet.
8. Mini Pumpkins on Nude
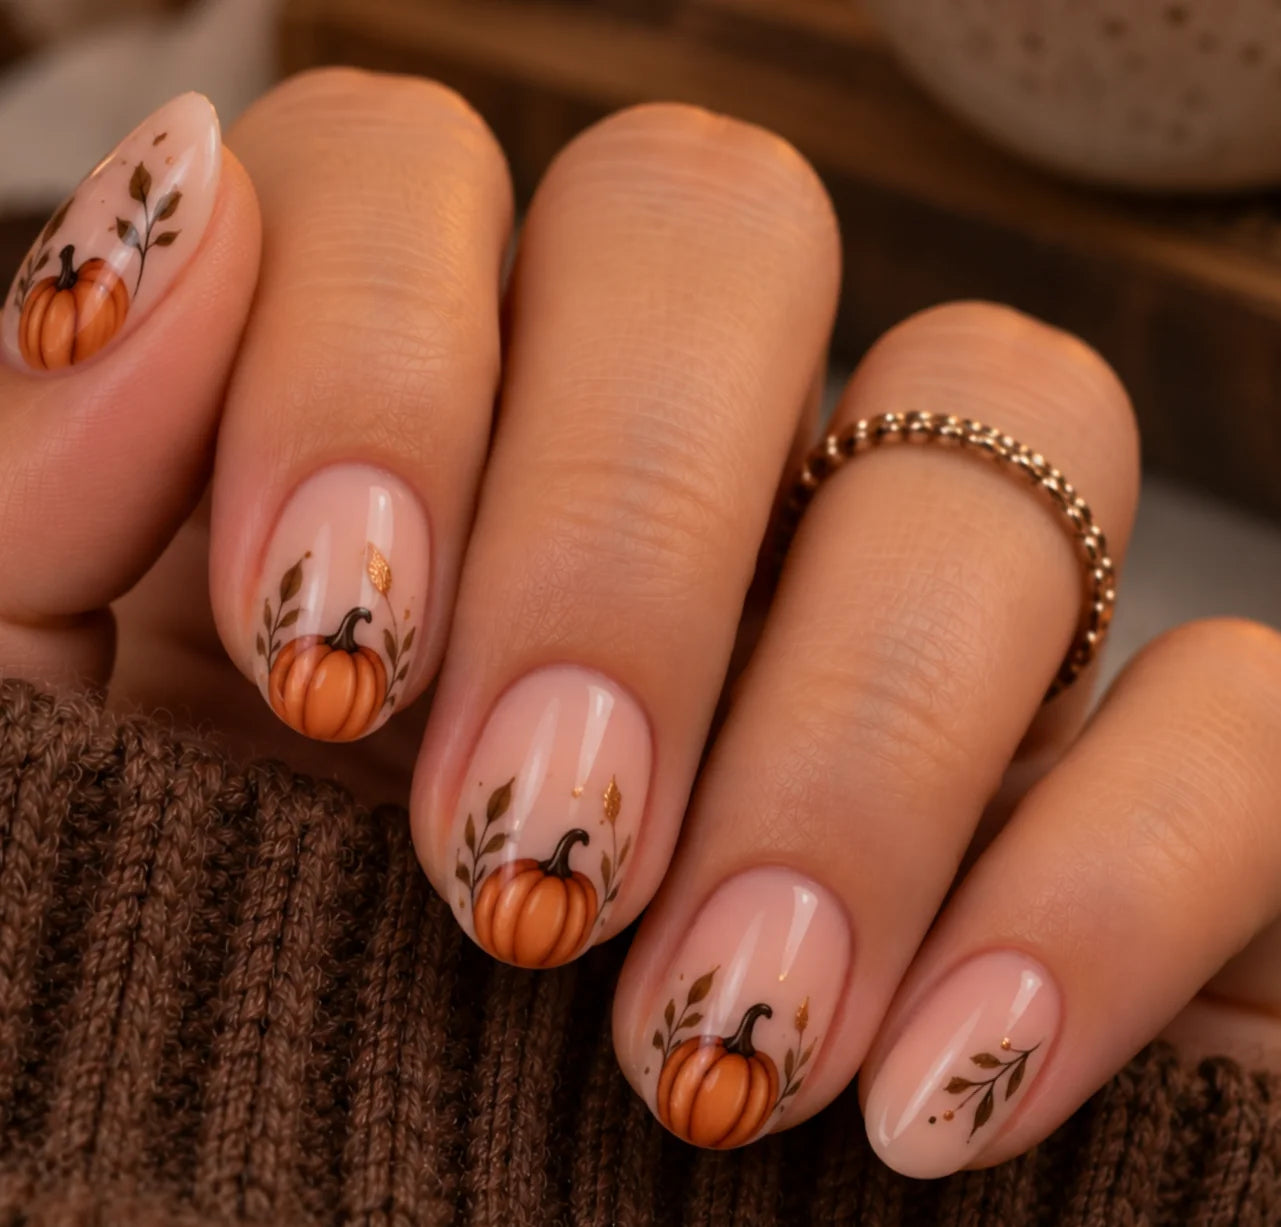
Tiny ones on a nude or milky base, one or two nails per hand. Paint a small orange oval, add two curved lines in a slightly darker orange for the ridges, then a little green stalk.
Want to make it trendy? Make the pumpkin pink. I'm not even joking, clients love it.
9. Chrome Mummy Wraps
White chrome on alternate nails, then white gel paint wrapped across the others in overlapping strips with two little black eyes peeking through. It's for the client who wants Halloween but refuses to give up her chrome.
Rub the chrome powder onto a properly cured no-wipe top coat. If it's under-cured, the powder goes patchy and you'll be redoing it.
10. Cute and Spooky Bats on Lilac
A soft lilac base with small black bat silhouettes, placed at slightly different angles on each nail so they look like they're flying across the hand. Clients always assume it took ages. It didn't. You can use nail stickers if you're short on time, but hand-painted always looks better up close.
11. Boo-tiful Glow-in-the-Dark Ghosts
Paint small ghosts in glow gel over a nude or black base. In the salon they look sweet and subtle. In a dark room, they light up.
Glow pigments charge in light, so tell your client to hold her hands under a lamp or her phone torch for a few seconds before she heads out. It's the little bit of theatre that gets photographed and tagged.
Spooky Halloween Nails for Clients Going All Out
These four showpieces are for clients who want their nails to steal the night. Book them in a longer slot. Seriously. Squeezing a 30-minute showpiece into a standard hour is how you end up running late, rushing your curing and doing a worse job.
12. The Chic Haunted Glazed Donut Mani
A black cherry or deep plum base, a fine rub of pearl or silver chrome, then Extreme Glaze on top. It's the glazed donut trend turned dark, with a thick, glassy, lit-from-within finish.
Extreme Glaze is a thick top coat, so it gives you depth that a standard top coat can't. It's the one I'd pick for any client who wants chic, grown-up nails that look like jewellery.
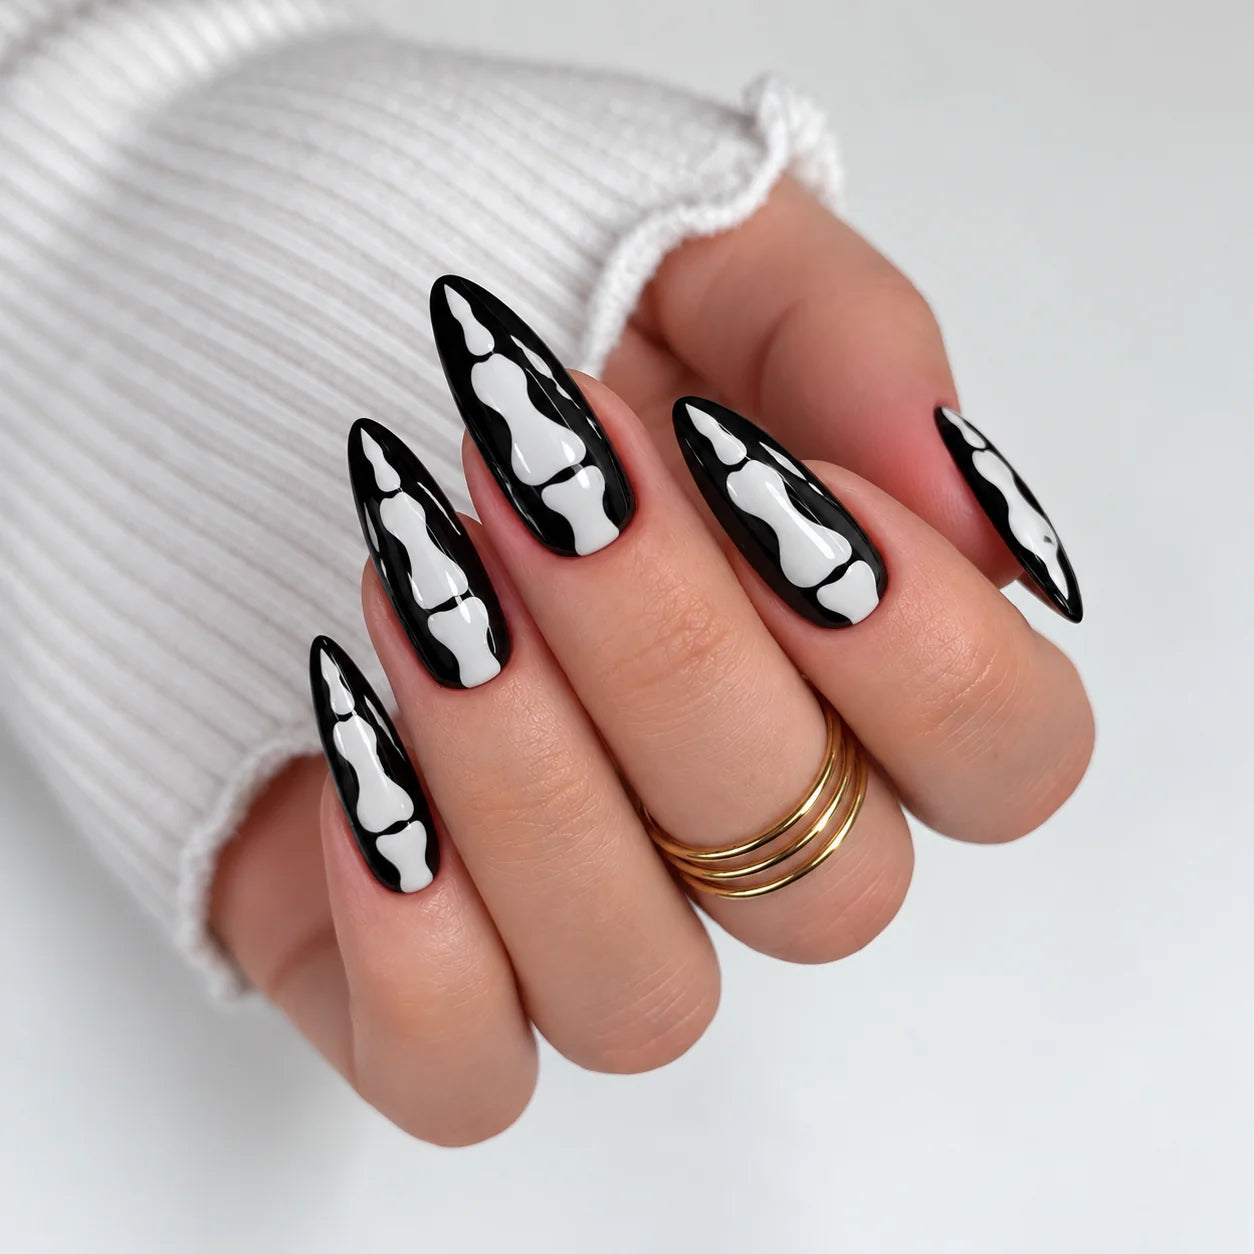
13. Skeleton Hand Ombré on Almond or Stiletto Nails
A black to grey ombré sponged on, then white skeleton finger bones painted from cuticle to tip so the whole hand reads as a skeleton when the fingers are together. It needs length to read properly, so save it for longer almond or stiletto shapes. It's the design that gets people grabbing your client's hand at the party.
Keep the bones thin and slightly rounded at each knuckle. Chunky bones look like cartoon dog bones.
14. Witching Hour Glitter
A deep purple glitter on every nail, packed with sparkle, then tiny gold moons and stars hand-painted across it. On the ring finger, build a little 3D witch's hat or crescent moon with 3D gel or a tiny bead of Hard Gel and finish with black rhinestones.
Sparkly, witchy, and not a scrap of orange anywhere. Save it for the client who's sick of pumpkins by the second week of October.
Keep 3D elements small and away from the cuticle area. A thick blob of gel can give a noticeable heat spike in the lamp, so cure in short bursts and warn your client it might feel warm for a second or two.
15. The Samhain Turnip, Ireland's Original Jack-o'-Lantern
A painted turnip with a carved face glowing orange from inside, because the turnip was Ireland's first jack-o'-lantern. This is the one I promised.
Long before the pumpkin, Irish families carved faces into turnips for Samhain, the Celtic festival that became Halloween. The switch only happened when the tradition crossed the Atlantic.
To paint it, start with a cream bulb fading into purple at the top, add a little tuft of green leaves, then the carved face. Put one on each ring finger with a deep purple or black on the rest.
Nobody else at the party will have it. And every time someone asks about her nails, your client gets to tell them where Halloween really started. That's the kind of design that ends up on your Instagram grid and brings in next year's bookings.
How to Make Halloween Manicures Last Past the Party
Halloween manicures last when the prep, the base and the curing underneath the art are right. Beautiful art on a set that lifts after five days does nothing for your reputation, and when a set fails, it's almost never the art's fault.
Start with proper prep. Push back and remove non-living tissue from the nail plate, lightly matt off the shine and dehydrate. Then use a base that's built for retention. Pro Base is what I use on clients whose sets tend to lift, and for sensitive clients, Ultra Builder Base is the softer option.
Keep every layer thin, especially dark shades and gel paints. Gel doesn't dry, it polymerises under the lamp, and light can only reach so far into a heavily pigmented layer. Thin layers, fully cured, give you a set that's solid all the way through.
One last thing. Seal all your art under the top coat, edges included. Raised art that isn't sealed is the first thing to catch on hair, jumper sleeves and car keys.
If you'd like the full picture, I've written a whole guide on HEMA-free gel polish and why it matters more than most brands will tell you.
How Much Should You Charge for Halloween Nail Art?
Charge by time. Take your hourly rate and price every ten minutes of art at a sixth of it. Work smart, not hard. Halloween nails aren't a freebie, and the art should never be priced as one.
So if you need to earn €45 an hour, every ten minutes of art is worth €7.50. So a quick ghost accent might be a small add-on, a web set a bit more, and a full skeleton hand is a separate showpiece service with its own booking slot.
Put your Halloween add-ons on your price list by the end of September and open October bookings early. The clients who plan ahead will book the showpiece slots first, and you'll know exactly how your month looks before it starts.
Want to Offer Nail Art Without Running Over?
You can, once your technique is solid, and that's exactly what our nail technician courses teach.
If you're newer to nails and the idea of hand-painting fifteen designs makes you nervous, that's completely normal. When I started, a set of French nails took me five hours. Every nail artist you admire on Instagram started exactly the same way. Speed and confidence come from good technique and practice, not talent.
They're built for people starting out, from prep and product knowledge right through to application. And everything you need for this list, from gel polishes to nail art tools and LED nail lamps, is in the Kohana shop with delivery across Ireland.
Get your Halloween kit sorted now, before the October rush hits your diary.
Your Halloween Nail Questions, Answered
Here are quick answers to the questions techs and clients ask us most about Halloween nails.
What is the easiest Halloween nail design to do?
Solid black with a no-shine finish is the easiest. Two thin coats or one medium, cured fully, then a shiny top first, fully cured, then matt that with a buffer and then apply no-shine top coat Super Matt Top Coat. If you want a little more Halloween, a single tiny ghost on a milky nude takes about five extra minutes.
Are spider web nails hard to do?
No. Paint three or four straight lines fanning out from one corner of the nail, then join them with small curved lines between each one. A fine liner brush and a thick gel paint make it much easier. By your tenth set, you won't even think about it. For the easiest and fastest thin lines use a Spider Gel.
What Halloween nails work best on short nails?
Short nails suit small, simple art like skinny black French tips, one tiny ghost per nail, a mini jack-o'-lantern or a plum cat eye. Avoid scenes that need a long nail to read, like skeleton hands.
How long does a Halloween gel manicure last?
A properly prepped and cured gel set should last two to three, four weeks, the same as any other gel manicure. That's why darker shades like oxblood and black cherry are so popular. They still look right in November.
Halloween comes around once a year. The clients who loved their set come round every three weeks. Do the art beautifully, price it properly, and let one little turnip do your marketing for you.
